If you don’t want to pay for N8N.io Cloud like me (because it is definitely costlier), then this straight forward guide will show you how to install N8N VPS Hosting in just 3 Steps.
Prerequisites for n8n VPS Hosting Setup
Before you begin, make sure you have the following ready:
- ✅ A VPS with root or sudo access
– Recommended: Hostinger KVM 1 ($5.99/month) or any VPS with at least 1 vCPU & 2–4GB RAM - ✅ A registered domain name
– Example:yourdomain.com - ✅ Docker & Docker Compose installed
sudo apt update
sudo apt install docker.io docker-compose -y
4. ✅ Nginx installed (for reverse proxy)
sudo apt install nginx -yStep 1: Run Docker Compose File
- SSH into your VPS Server.
ssh <user>@<server ip address> or <domain name>
e.g. krishna@codejana.com - It will ask for a password if you have not setup ssh key.
- After successfully logging into your VPS Server, change directory to your username.
e.g. cd /home/krishna (in my case)
e.g. cd /home/Ubuntu - To check your user directory, just type: cd /home
then, type ls & press Enter. - Above command will display the contents of /home directory.
Then you can change directory into your user directory. - Now, let’s create a directory where N8N files will be saved once we run Docker Compose command.
- sudo mkdir n8n_public: (this name can be anything you like, BUT, it should also be mentioned in the docker compose file.
Now, change directory to this n8n_public directory: cd n8n_public - Create a .env file to store variables that we are going to use in our docker-compose.yml file.
sudo nano .env :
# .env file
# DOMAIN_NAME and SUBDOMAIN together determine where n8n will be reachable from
# The top level domain to serve from
# DOMAIN_NAME=codejana.com
DOMAIN_NAME=Your-domain-name.com

# The subdomain to serve from
# SUBDOMAIN=n8n
SUBDOMAIN=sub-domain

# Optional timezone to set which gets used by Cron and other scheduling nodes
# New York is the default value if not set
# GENERIC_TIMEZONE=ASIA/KOLKATA (my time zone)
GENERIC_TIMEZONE=time-zone

# The email address to use for the TLS/SSL certificate creation
# SSL_EMAIL=codejanauni@gmail.com
SSL_EMAIL=valid-mail-address@domain.com
Press Ctrl+X to Exit file & Y to confirm changes.
9. Create the docker-compose.yml file
sudo nano docker-compose.yml (press Enter)
# docker-compose.yml
services:
  n8n:
    image: docker.n8n.io/n8nio/n8n
    container_name: n8n
    restart: always
    ports:
      - "127.0.0.1:5678:5678"
    environment:
      - N8N_HOST=${SUBDOMAIN}.${DOMAIN_NAME}
      - N8N_PORT=5678
      - N8N_PROTOCOL=https
      - NODE_ENV=production
      - WEBHOOK_URL=https://${SUBDOMAIN}.${DOMAIN_NAME}/
      - N8N_BASIC_AUTH_ACTIVE=true
      - N8N_BASIC_AUTH_USER=enter-server-username
      - N8N_BASIC_AUTH_PASSWORD=enter-server-username-password
      - GENERIC_TIMEZONE=${GENERIC_TIMEZONE}
    volumes:
      - n8n_public:/home/node/.n8n
      - ./local-files:/files

volumes:
  n8n_public:
Press Ctrl+X to Exit file & Y to confirm changes.
10. Run sudo docker-compose -d up
Above command will build and run the docker image from the configuration in docker-compose file.
You can verify the instance running with, sudo docker ps -a

Step 2: Buy a domain or subdomain to easily open your N8N VPS Instance
This step doesn’t require explaining the steps. Simply visit your domain registrar of choice, mine is Namecheap.com, and buy yourself a domain name.
- If you already have domain name & just want to have a subdomain attached to your N8N vps instance, like I did in the configuration above, then follow along.
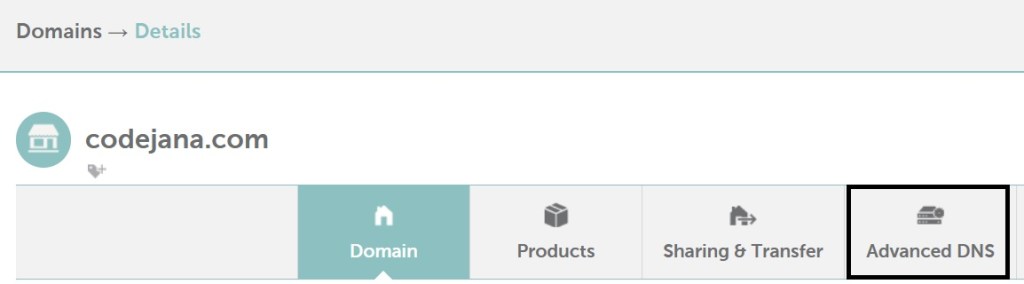
- Open your domain registrar’s account & click on your domain name.
- You will find a button or link to open DNS Records.
- We need to add a CNAME record:


Step 3: Create N8N NGINX Config File
- Create an nginx config file so that we can visit our N8N VPS Instance from n8n.codejana.com (or your-subdomain.domain-name.com).
- sudo nano /etc/nginx/sites-enabled/n8n-nginx-conf
server {
    listen 80;
    server_name subdomain.yourdomain.com;

    location / {
        proxy_pass http://127.0.0.1:5678;
        proxy_set_header Host $host;
        proxy_set_header X-Real-IP $remote_addr;
        proxy_set_header X-Forwarded-For $proxy_add_x_forwarded_for;
        proxy_set_header X-Forwarded-Proto $scheme;
    }
}
3. Check nginx config file for errors: sudo nginx -t
If the test comes back successful then great!
4. Restart nginx so that it recognizes the conf file & loads our N8N VPS instance.
sudo systemctl restart nginx
Wait for a few minutes before accessing n8n.codejana.com (or your-sub-domain.domain-name.com). Remember that you DON’T need a subdomain to host N8N. Just change the Nginx file to only have server_name as yourdomain.com and update the docker-compose.yml file to reflect the same.
Step 4 (optional): Secure your N8N Domain with FREE SSL
To avoid annoying “Not Secure” browser warnings or failed webhook calls due to invalid HTTPS, it’s best to install an SSL certificate.
The good news? It’s completely free thanks to Let’s Encrypt — and you can set it up in minutes using Certbot.
🛠️ Here’s how to do it:
- Make sure your Nginx config is working and accessible at
http://your-subdomain.yourdomain.com(without HTTPS yet). - Install Certbot with the Nginx plugin:
sudo apt update
sudo apt install certbot python3-certbot-nginx- Run Certbot to fetch and install the SSL certificate:
sudo certbot --nginx -d sub-domain.yourdomain.comVerify success:
Certbot will automatically update your Nginx config to use HTTPS and reload Nginx. You should now be able to visit: https://n8n.codejana.com OR https://subdomain.domain.com.
❗ Important. Auto-renewal:
Let’s Encrypt certificates are valid for 90 days, but Certbot handles auto-renewal.
To test the renewal process, run:
sudo certbot renew --dry-runThat’s it, that’s the whole process of installing N8N VPS Hosting. If for some reason, you couldn’t install N8N on your VPS Hosting, then don’t hesitate to reach me out for the same.
Support: codejanauni@gmail.com
Checkout our posts on AI Agents
Disclaimer: This post contains affiliate links. If you choose to make a purchase through them, we may earn a small commission — at no extra cost to you. In fact, you might even unlock a sweet discount along the way!